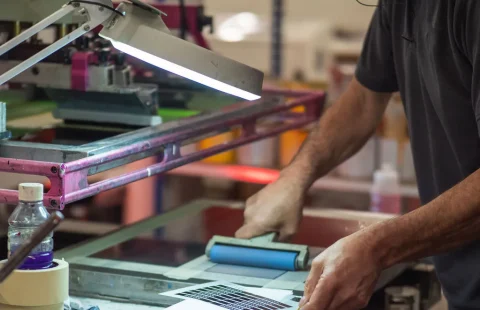

How to adjust the exposure time for screen printing?
Short answer: Screen printing exposure time is adjusted according to the emulsion used, light source, film opacity, mesh number, emulsion thickness, glass cleanliness, and plate dryness. There is no single exposure time that applies to every workshop. The most accurate method is to perform a test exposure on the same plate and record the exposure time that yields the clearest result.
The answer to the question of how to adjust screen printing exposure time is not as simple as "wait this many minutes." This is because the screen printing plate is prepared by the controlled hardening of a light-sensitive emulsion. Areas exposed to light harden, areas covered by the film open up during washing, and the paint transfer area is created. If you don't establish this basic logic correctly, errors will begin even before the printing stage.
To understand the general principles of screen printing technique, consider Tate's screenprint definition and The Met's screenprinting explanationIt provides a good technical background. However, the real key to determining quality in the workshop is applying this template logic with the right equipment and the correct exposure time.
This guide will explain step-by-step the factors affecting screen printing exposure time, the test exposure method, the signs of under and overexposure, the practical adjustment logic for 50x70 and 70x100 exposure machines, and the checks that should be performed during the plate-making process.
Contents
- What is the exposure time for screen printing?
- Why isn't the exposure time fixed?
- Main factors affecting exposure time
- How to perform a test exposure?
- How can you tell the difference between underexposure and overexposure?
- Exposure time setting on 50x70 and 70x100 cameras.
- Emulsion, film, mesh, and light matching.
- Mold washing and final inspection.
- Choosing workshop equipment
- City-based supply and technical support
- Frequently Asked Questions
What is the exposure time for screen printing?
Screen printing exposure time is the length of time the emulsion-coated screen printing plate is exposed to light in the exposure machine. During this time, the emulsion hardens in the areas exposed to light. The areas that remain black on the film, i.e., the areas that do not allow light to pass through, open up during developing, forming the print pattern.
Short answer: Screen printing exposure time is the controlled amount of time required for the emulsion on the plate to cure with light. If the time is too short, the emulsion may disperse during washing; if the time is too long, the pattern will not develop, fine lines will be obscured, and detail will be lost in the print.
Therefore, exposure time directly affects print quality. With the correct exposure time, lines are clearly defined, ink transition areas are clean, and the plate behaves more stably during printing. With the wrong exposure time, however, no matter how carefully the operator works on the printing machine, the result will not reach the desired level.
Those who want to establish the general flow of the mold making process should first How to do screen printing: guide Through this, we can examine the design, film, plate, emulsion, exposure, washing, and printing steps together. Exposure time is right in the middle of this chain.
Briefly
- Exposure time is the length of time the pattern remains under light.
- The correct timing ensures a clear unfolding of the pattern.
- Underexposure weakens the pattern.
- Overexposure can obscure fine details.
- The most reliable method is test exposure.
Why is the exposure time not fixed?
One common mistake in screen printing is trying to find a single exposure time that works for everyone. However, even if the same emulsion is used in two different workshops, the correct exposure time can change depending on factors such as light intensity, glass quality, film density, mesh number, coating thickness, and ambient conditions.
Short answer: Exposure time is not fixed because each workshop has different light sources, emulsion types, film opacity, mesh structures, and plate-making practices. Therefore, minute values obtained from the internet can only give a starting point and are not a definitive setting.
For example, a freshly coated and fully dried plate will react to light differently than a plate that has remained damp. Similarly, a film with poor opacity can cause light to leak through dark areas. In this case, even if the drying time is correct, blurring or closing of the pattern edges may occur.
Professional results first require the selection of the right equipment. Workshops that want to streamline their mold making process. Exposure cameras category They can examine models suitable for their field of work. For small and medium-sized molds. 50x70 screen printing exposure machine, for workshops that need larger mold sizes 70x100 screen printing exposure machine This should be given special consideration.
Briefly
- There is no single universal exposure time.
- The duration may vary if the machine and light source are changed.
- Details can be distorted if the film opacity is poor.
- Exposure behavior changes as emulsion thickness increases.
- Record keeping provides standardization in repetitive tasks.
Main Factors Affecting Screen Printing Exposure Time
Simply looking at the stopwatch isn't enough to find the correct exposure time. Exposure time is determined by considering the plate, emulsion, film, light, glass, and developing stages together.
1. Emulsion type
Each emulsion has a different sensitivity to light. Some emulsions harden faster, while others require longer. Therefore, it is not correct to automatically use the old hardening time when the emulsion is changed. In the mold making stage, emulsion, degreaser, and auxiliary products should be considered together. To see product groups in this area... masks and emulsions categoryIt can be examined.
2. Emulsion coating thickness
Applying too much emulsion to the mold makes it more difficult for the light to adequately cure the entire layer. Applying too thin a coating can negatively affect mold strength and print clarity. Coating technique is as important as curing time.
3. Mesh count and silk structure
As the mesh number increases, the mesh size decreases, detail transfer changes, and the way the emulsion adheres to the mesh differs. High mesh size can be used for fine detail work; however, in this case, exposure, film, and dye selection should be planned together. For the correct frame and screen selection on the plate side... printing plates categoryAppropriate measurements can be evaluated based on this.
4. Film opacity
If the black areas on the film are not sufficiently opaque, light will leak through. In this case, the areas where the print should be may also partially harden. As a result, the pattern becomes difficult to open, fine text is obscured, or edges are not clearly visible. Among the auxiliary products used to increase film density are... Aydinger blackout products Options like these can be evaluated by verifying the product scope before purchasing.
5. Light source and homogeneity
The light in the exposure camera should be evenly distributed across the entire lens. If there is too much light in one area and too little in another, both overexposure and underexposure symptoms can be seen in the same lens. Therefore, when choosing exposure equipment, one should consider not only the size but also the light distribution and the smoothness of the glass surface.
6. Glass cleaning and film-mold contact
Dirty, scratched, or warped glass can impair light transmission. If the film doesn't make full contact with the mold, light leaks from the sides, reducing detail sharpness. (Warhol Museum's) in the photographic screen printing plate making course The emulsion coating, drying, and film exposure stages are considered together; this shows that the process is not just about setting the time.
7. Dryness of the mold
Exposure before the emulsion is completely dry can cause uneven plate development. Even if the plate appears dry from the outside, the inner layer of the emulsion may remain moist. In this case, the emulsion will dissolve excessively during washing, or details will be distorted.
Briefly
- If the emulsion changes, the duration should be retested.
- Thick coatings require more careful exposure.
- Even the correct duration can be unsuccessful if the film opacity is poor.
- Glass cleanliness and contact quality determine the details.
- Exposure should not be done before the plate is completely dry.
How to Test Screen Printing Exposure Time?
The most accurate way to adjust exposure time is to perform a test exposure. This method allows you to experiment with different exposure times on the same pattern to see at what time the design develops most clearly.
Short answer: For test exposure, sections from the same design or test template are placed on the plate. Each section is exposed for a different duration. After developing, fine lines, text, halftones, and wide areas are checked. The section that appears clearest, has intact edges, and retains its emulsion indicates the ideal exposure time.
Step-by-step test exposure
- Remove grease, dust, and old residue from the mold. At this stage, choose the appropriate cleaner. oil remover products It can be examined.
- Apply the emulsion to the mold to an even thickness.
- Allow the mold to dry completely in a clean, dust-free environment away from light.
- Prepare a test film or a detailed pattern film.
- Place the plate in the exposure machine.
- Expose the first section for a short time, then gradually increase the exposure time for the subsequent sections.
- Inspect each section separately after washing.
- Note the time it takes for the cleanest opening.
In test exposures, don't just look at whether the main pattern is developing. Small text, fine lines, halftones, and large filled areas should all be checked together. This is because some exposure times may look good on thick lines but fail at small details.
Practice test chart
| Test Section | The Logic of Time | Expected Observation | Comment |
|---|---|---|---|
| Chapter 1 | Shortest trial | The emulsion is easy to dilute but may remain weak. | Risk of underexposure |
| Part 2 | Medium to short duration | Details are opened, edges are checked. | He could be a good candidate. |
| Chapter 3 | Medium term | The pattern is clear, the emulsion appears solid. | The range that usually needs to be checked. |
| Chapter 4 | For a longer period | Fine details may start to become blurred. | Risk of overexposure |
| Chapter 5 | The longest trial | The pattern is difficult to open or close. | Most jobs can stay longer than necessary. |
When recording the test results, note down information such as "emulsion name, mesh number, coating method, exposure machine, film type, date, and ambient conditions." This way, you won't have to start from scratch when you receive the same job again.
Briefly
- The correct time is determined through testing.
- Records must be kept for each emulsion and mesh combination.
- Fine lines and small font are the most critical aspects of the test.
- Emulsion stability should also be checked after washing.
- Creating a time log for repetitive tasks is useful.
How to tell if there's underexposure?
Underexposure means the emulsion hasn't hardened sufficiently. In this case, the plate expands excessively during washing, the pattern edges are distorted, or the plate wears out quickly during printing.
Short answer: Signs of underexposure include excessive emulsion dissolution during washing, blurring of lines, a slippery and weak-looking plate, emulsion degradation during printing, and unclear pattern edges. In this case, the washing time should be increased or the drying/film/coating process should be checked.
Errors seen in underexposure.
- The pattern is too wide.
- The emulsion breaks down during washing.
- The edges of the mold appear rough.
- Fine details get lost.
- During printing, the ink leaks uncontrollably.
- The mold wears out quickly.
Underexposure isn't solely caused by insufficient exposure time. Similar symptoms can also occur if the plate remained damp, the emulsion was applied too thickly, the light intensity was weak, or the glass/film contact was faulty.
How to tell if there's been overexposure?
Overexposure occurs when light remains on the plate for an unnecessarily long period. In this case, the areas where the print should be begin to harden, and the pattern does not develop during washing.
Short answer: Signs of overexposure include difficulty in developing the pattern, obscured small text, loss of fine lines, filling of halftones, and excessively long developing times. In this case, the developing time should be reduced, and film opacity and glass contact should be rechecked.
Errors seen in overexposure.
- Fine lines won't disappear.
- The small text disappears.
- The pattern is difficult to remove during washing.
- Tramway areas appear full.
- Light leakage occurs at the edges of the film.
- Extreme water pressure may be required to open the mold.
When faced with overexposure, many users increase the washing pressure. This approach can sometimes damage the plate, even if it opens up the pattern. A more accurate solution is to retest the exposure time and film opacity.
Underexposure and Overexposure Comparison Table
| Symptom | Underexposure | Overexposure | Solution |
|---|---|---|---|
| Washing behavior | The emulsion dissolves excessively. | The pattern is difficult to open. | Reset the time using the test. |
| Fine lines | It disintegrates or breaks apart. | It closes or doesn't open at all. | Check the film and duration. |
| Mold strength | It remains weak. | Durable, but the printing area may be closed. | Check the emulsion and coating thickness. |
| As a result of the pressure | Too much paint may pass through. | Paint transfer may be reduced. | Print a test copy. |
| Washing pressure | It opens even at low pressure. | It requires high pressure. | Avoid excessive pressure. |
How to adjust the exposure time on a 50x70 exposure camera?
A 50x70 cm exposure camera is generally a practical solution for small to medium-sized plates, beginner workshops, promotional printing jobs, t-shirt trials, labeling, and educational purposes. However, the compact size doesn't mean the time setting is unimportant.
Short answer: When setting exposure times on a 50x70 exposure camera, first fix the plate size, film opacity, and emulsion coating thickness you are using. Then, perform graduated exposures with the same test film. After determining the exposure time that provides the clearest exposure, record it for the same material combination.
If small and medium-sized molds are being prepared in the workshop 50x70 screen printing exposure machine This can be a strong starting model in terms of space saving and practicality. When working with this model, it's more reliable to test the exposure with a real test film containing fine lines, text, and solid areas, rather than with small patterns.
Beginners should not consider exposure time settings separately from printer selection. For example, in a workshop planning to print t-shirts... t-shirt printing press, for small batch production screen printing desktop printing apparatus and describing the initial process A guide on how to get started with screen printing. They should be evaluated together.
Briefly
- The 50x70 model is suitable for compact workshops.
- Test exposure is essential even for small molds.
- Determining the time solely through estimation increases the risk of error.
- Records must be kept for the same emulsion and mesh.
- In the beginner's workshop, exposure, printing, and drying should be planned together.
How to adjust the exposure time on a 70x100 exposure camera?
A 70x100 exposure camera offers an advantage for workshops preparing larger plates. With larger plates, timing becomes more critical because small imbalances in light distribution can produce more visible results over a wide area.
Short answer: When setting the exposure time on a 70x100 camera, ensure that a similar light effect is achieved at every point on the image. Test the film by spreading it across different areas, not just the center. If the edges and center areas open with the same sharpness, the exposure time and light distribution are considered more reliable.
For professional workshops, large molds and large surface area printing. 70x100 screen printing exposure machine It offers a wider range of applications. This size allows for more flexible use in preparing molds used in textiles, promotional items, glass, metal, plastics, labels, and industrial surfaces.
In businesses working with large plates, exposure time is also related to the choice of printing machine. For example, on flat and wide surfaces... screen printing vacuum manual printing machine, for bigger jobs 70x200 vacuum manual printing machineor 100x200 vacuum manual printing machineIf used, the plate size and exposure area should be considered together.
Briefly
- The 70x100 model offers an advantage for larger molds.
- The test film should be tested at different points on the mold.
- Light homogeneity becomes more critical in larger molds.
- The printing press dimensions and the plate dimensions must match.
- In professional production, time records ensure standardization.
How to Establish Compatibility Between Emulsion, Film, and Mesh?
Even if the screen printing exposure time is set correctly, the result may be poor if the emulsion, film, and mesh are incompatible. These three elements determine the resolution and durability of the plate.
Better film opacity is required for fine detail work. For large, filled areas, emulsion strength and wash stability become even more important. Textile, PVC, glass, metal, and plastic surfaces can each exhibit different paint and mold behavior. Therefore... Screen printing materials guide And screen printing materials category Paint, squeegee, mold, and auxiliary materials should be selected by examining them together.
The squeegee, which controls the ink transfer during printing, also affects the plate result. If the squeegee does not function properly during printing, even a correctly prepared plate will not yield the expected result. This applies to the squeegee and auxiliary equipment. screen printing squeegee options It should be evaluated according to the type of production.
On the emulsion side Zoico Porymer ESR high emissionAnd Zoico Porymer ESC high emission When examining products like these, it's essential to verify with the manufacturer before purchasing which printing type and operating conditions the product is suitable for. Since product name, stock availability, price, and usage scope may change over time, the most up-to-date product page should be used as the basis for purchasing decisions.
How does mold washing affect exposure results?
If the mold is not washed correctly after exposure time, the result can be spoiled even if you have found the ideal time. The aim during washing is to loosen the soft emulsion in the areas that did not receive light and to preserve the hardened emulsion in the areas that did receive light.
Short answer: Washing after exposure should be done in a controlled manner. Too low pressure will make it difficult to develop the pattern; too high pressure can damage the hardened emulsion. The mold should first be gently moistened, then washed with even pressure until the pattern develops.
In workshops with high production volumes, this stage needs to proceed in an orderly and clean manner. screen printing plate washing boothIt is usable. The more controlled the mold washing area is, the better both workshop cleanliness and mold opening standards can be managed.
After the mold is washed, it should be held up to the light to check the edges of the pattern, small text, unnecessary holes, and closed areas. If necessary, retouching and mold hardener applications are evaluated. At this point... mold hardening products The use of auxiliary products such as these should be verified according to the product instructions and printing requirements.
Does the exposure time vary depending on the printing surface?
Exposure time varies not directly according to the printing surface, but according to the emulsion, mesh, film, and lighting system used during plate preparation. However, since the printing surface affects the choice of ink and mesh to be used, it can indirectly influence the exposure time setting.
In textile printing, dye transfer, drying, and fixation procedures are crucial. In this field... drying systems category, for small and medium-sized businesses 50x70 cm screen printing paint drying rack, for higher production flow conveyor dryer fixing tunnel It can be examined.
In glass printing, plate clarity, ink selection, and surface cleanliness become more precise. For detailed information specifically on glass printing, please see [link to relevant documentation]. Guide to how to do glass printing This can be examined. Since it is important for the material to remain stable during printing on flat and slippery surfaces. 80x250 vacuum-free manual printing machine or vacuum systems should be compared according to the type of application.
Users planning to invest in new machinery should consider not only mold making but also the selection of printing presses. Guide to choosing a screen printing machine., Guide to choosing a screen printing exposure machine. And What is a screen printing machine? (guide) This completes the technical side of the decision.
How to set up the right system for exposure time in a workshop?
For effective exposure time adjustment, the following setup should be established in the workshop: a clean plate preparation area, controlled emulsion coating, a light-proof drying area, a reliable exposure machine, a well-organized developing area, and a recording system. Without this setup, simply adjusting the time will not provide a lasting solution.
In the beginner workshops 4-color, 1-station screen printing press, in small jobs screen printing stand, in more controlled mass production targets semi-automatic screen printing machine and for cylindrical products semi-automatic circular printing machine It can be evaluated according to the use case.
On the paint, mold and auxiliary materials side Screen printing auxiliary materials category, to understand costs in a broader context Guide to screen printing supplies prices. and for a broader equipment overview Guide to professional screen printing supplies It can be examined.
City-Based Screen Printing Materials and Technical Support
Screen printing exposure time adjustment is a common problem not only for workshops in Istanbul but also for mold-making manufacturers throughout Türkiye. For users seeking city-based suppliers, OkanGökhan can provide redirection through existing city pages within the site structure.
Workshops that conduct local supplier and product group research; Istanbul screen printing supplies, Screen printing supplies in Ankara., Screen printing supplies in Izmir., Screen printing supplies in Bursa. And Screen printing supplies in Kocaeli.You can review the relevant equipment groups on their pages.
For businesses that manufacture in different regions Adana screen printing supplies, Gaziantep screen printing materials, Screen printing materials in Konya., Screen printing materials in Eskişehir., Balıkesir screen printing materials, Samsun screen printing materials And Screen printing materials in Tekirdağ.These pages can also be used for city-based product research.
City pages should avoid using precise industry data or exaggerated claims of local superiority. The most appropriate approach is to obtain technical support based on the printing surface, plate size, production quantity, and required equipment group.
UV Light and Workshop Safety Note
Eye and skin safety should not be neglected when working with the lighting systems used in exposure machines. Depending on the type of light used, it is necessary to avoid looking directly at the light, reduce unnecessary contact time when the cover is open, follow the manufacturer's warnings, and establish safe working habits within the workshop.
OSHA's general approach to occupational safety regarding UV light. explanation of ultraviolet radiation and from the CDC/NIOSH source Ultraviolet radiation and work environment notes These resources can be reviewed. They do not replace screen printing machine operating instructions; however, they offer a useful framework for safety awareness in light-based workshops.
Conclusion: How to Adjust Screen Printing Exposure Time?
The most reliable answer to the question of how to adjust screen printing exposure time is a test exposure. The correct time cannot be determined without stabilizing the emulsion, film, mesh, light intensity, glass cleanliness, and plate dryness. General times found online can only give a starting point; in professional production, testing under your own workshop conditions is essential.
For users working with small and medium-sized molds. 50x70 screen printing exposure machine, for wider molds and professional production flow 70x100 screen printing exposure machine They are strong options. Users who want to evaluate all models together. OkanGökhan Exposure Cameras Category You can browse the products online.
The correct exposure time is determined by using the right machine, the right emulsion, the right film, a clean plate, controlled washing, and a recorded testing process. Those wishing to receive technical support from OkanGökhan Screen Printing Machines can request assistance in selecting the most appropriate equipment by sharing the surface to be printed on, plate dimensions, emulsion used, target production quantity, and workshop space.
Frequently Asked Questions
1. How to adjust the screen printing exposure time?
Screen printing exposure time should be adjusted by performing a test exposure. First, the emulsion, film, mesh, plate dryness, and light source are stabilized. Then, different exposure times are tested on the same plate. The section that opens clearest after washing, has intact edges, and retains its emulsion shows the ideal exposure time. A single fixed minute value is not accurate for every workshop.
2. What should the screen printing exposure time be in minutes?
The exact exposure time varies depending on the light intensity of the exposure camera, emulsion type, film opacity, mesh number, and coating thickness. Therefore, giving a precise minute value is not accurate. The technical instructions of the products used can be a starting point; however, the most reliable result is determined by a test exposure. Once the time is determined, it should be recorded for the same combination of materials.
3. How can you tell if I've underexposed?
In case of underexposure, the emulsion does not harden sufficiently. During washing, the pattern may open up excessively, the emulsion may break down, fine lines may disperse, and the plate may deteriorate quickly during printing. In this case, the drying time should be increased; the complete drying of the plate, the emulsion thickness, the light intensity, and the film-plate contact should also be checked.
4. How can you tell if I've overexposed?
Overexposure makes it difficult to develop the pattern during washing; small text becomes obscured, fine lines disappear, and halftone dots appear filled. Users often try to develop the pattern with higher water pressure, but this can damage the plate. A more accurate solution is to reduce the washing time and recheck the film opacity and glass contact.
5. How do you determine the exposure time on a 50x70 exposure camera?
In a 50x70 exposure machine, the emulsion, mesh, and film are first fixed. After the plate is completely dry, a staged exposure is performed with a test film. After developing, small text, lines, filled areas, and edges are checked. The cleanest exposure time is recorded. If the emulsion or film is changed, the test should be repeated.
6. Is the exposure time setting different on a 70x100 exposure camera?
The basic principle is the same; however, in larger working areas such as 70×100, light homogeneity must be controlled more carefully. The test film should be placed not only in the center of the plate but also in the edge areas. If the center and edge areas open with similar clarity, the timing and light distribution are considered more reliable.
7. Does the exposure time change when the emulsion is changed?
Yes. Each emulsion can have a different sensitivity to light. Even when working with the same machine and film, the correct exposure time may change when the emulsion is changed. Therefore, instead of directly using the old exposure time when switching to a new emulsion, a test exposure should be performed. Also, the product's technical instructions should be checked before purchase and during use.
8. Does film opacity affect exposure time?
Film opacity significantly affects the exposure result. If the black areas don't block enough light, light will leak through, and the areas where the print should be can become partially hardened. In this case, even if the exposure time is correct, the pattern will be difficult to develop or fine details will be obscured. Film quality is particularly critical for small text, logos, and halftone work.
9. What happens if the exposure is done before the plate is completely dry?
If the plate is exposed before it is completely dry, the emulsion may harden unevenly. During washing, some areas may open up excessively while others remain weak. This leads to both a loss of detail and a decrease in plate durability. The plate should be completely dried in a clean, dust-free environment away from light before exposure.
10. Does the mesh number change the exposure time?
Mesh number can alter exposure behavior because it affects how the emulsion adheres to the plate and the transfer of detail. A high mesh size used for fine detail work may not require the same exposure time as a more open mesh. Therefore, it is more accurate to test each mesh-emulsion-film combination and record the results.
11. How should the mold be washed after exposure?
After exposure, the mold should first be gently moistened, then washed with controlled pressure until the pattern opens. Too low pressure can make it difficult to open the pattern; too high pressure can damage the hardened emulsion. After washing, the mold should be held up to the light to check for any closed details, unnecessary holes, and edge distortions.
12. Is the exposure time different for each printing surface?
Exposure time is determined not directly by the printing surface, but by the plate preparation conditions. However, the printing surface can influence the choice of dye and mesh. Different dye and mesh preferences may be required for textile, glass, metal, PVC, and plastic surfaces. This can indirectly alter the emulsion and exposure time test.
13. Does the choice of exposure camera affect the exposure time setting?
Yes. The light intensity, light distribution, glass surface, and working area of the exposure camera affect the exposure time setting. The same emulsion and film may not yield the same results with different cameras. Therefore, the test exposure should be repeated when the camera is changed. Choosing an exposure camera suitable for the plate size is also important for consistent exposure times.
14. How should exposure time records be kept?
The logbook should include the emulsion name, mesh number, film type, coating method, exposure machine, test duration, washing result, and date. Ambient humidity and mold drying conditions can also be noted. These records save time on repetitive tasks and establish a standard production quality within the workshop.
15. Should technical support be obtained regarding screen printing exposure time?
Beginners or workshops transitioning to different surfaces can progress more smoothly with technical support. This is because exposure time is not just a minute setting; it's the combined effect of emulsion, film, mesh, lighting, plate washing, and printing equipment. Sharing the printing surface, plate dimensions, and production goals will allow for more accurate equipment and process recommendations.